Post #3 Tires, Brakes, Lugs, and more
Hello everyone. In regards to progress, I have created tire, lug nut, and brake rotor models. They fit together well enough, and the brake rotors have holes in them via booleans and duplicate special to mimic the look of a drilled brake rotor.

Displayed here, you can see the lug nut and brake rotor models. The brake rotor had indents as a drilled brake rotor does, and the lug nuts mimic the common hexagon-style nut head. Below is the entirety of the current wheel model.

The tire is not just a tube/cylinder, but has the tread as real geometry. The tire sidewall is left as-is, as it will be begin a material to display the tire specification text. I utilized moving rows of vertices to achieve the look of tire tread, as well as the extrusion tool. The insert edgeloop tool was used to make the tire sidewall more believable as well.
This will be composited either within Photoshop and Substance Painter, using a photograph that I took of the tire sidewall myself, and edited to become a normal map, texture map, diffuse map, etc.

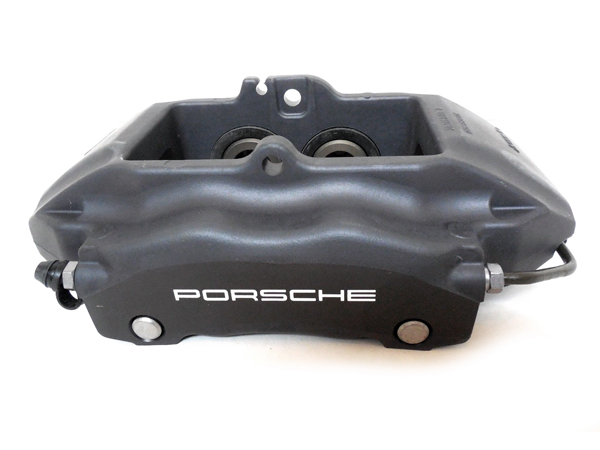
I will later create the caliper and brake pads to finish off the basic wheel geometry, and then move onto other highlighted areas of the vehicle that will be used. I am considering creating the caliper in Zbrush because of the geometrical complexity of the object; it has an odd shape that may not be suited for hard-surface modeling, as seen in this reference image below.
As mentioned in the previous blog post, due to time constraints and the busy nature of this semester, and work-life balance, I will be unable to model the entirety of the car itself, however, just as I am almost done with the wheel components - I will create high-quality model portions of the car. With these rendered models I will later composite them into Photoshop or After Effects. The end-goal is to create promotional-esque material/posters/graphic designs regarding this car, the Porsche 987 Boxster, with these models.
I decided to experiment with hypershade as well through Maya 2023. I created two testing materials for the tire. All materials are used with the Arnold Standard Surface material in HyperShade. Below you can see the hypershade settings for the first tire material.

I attempted to create high frequency and low-frequency noises to try and merge around with a somewhat-organic looking substance, though the end-result bounced too much light around so I will revise it later:

Therefore, I created a more straightforward and basic temporary tire material through HyperShade. Below is the Arnold render with the second, temporary tire material. A material for the brake rotors was also provided, which I based off of the wheel rim material.

I am quite satisfied with my results so far, though I am worried I have focused too much on one specific portion of the project, that being the wheels. I would like to expand into other highlighted areas of the vehicle to use in the graphic designs, such as body panels and the gear shifter, or steering wheel, if it is not too challenging. I would like to give myself a proper challenge, but not something overbearing. Over the next few weeks, I am going to pick up the pace modeling and sculpting-wise, so that I will have proper time to create materials and graphic assets to use in the final renditions of the project. Again, I will review my timeline, re-do said timeline, and ensure that I deliver a finished, high-quality project.
Please let me know what you think, and if you have any comments or concerns. I would be glad to discuss with you all about this project, as it has been a very engaging and enlightening journey so far.
- Stefan

Comments
Post a Comment